Hello Friends,
We at the creator club have been having lots of fun making things and learning, but the blogger is waayyy behind on updating the blog. Hopefully he will get caught up in the weeks to come.
Tom
Tuesday, April 26, 2011
Friday, February 18, 2011
Speak into the speaker!
 In this session we introduced the boys to alternating current (AC). The first AC signals we looked at were generated by my "guitar string," a wire that was strung over a strong permanent magnet. As the wire is plucked, it generated a voltage which could be observed on the O'Scope. Then the boys learned that an old speaker from a radio can not only move air so we can hear the AC signals, but it can generate fast AC signals from high pitched voices and slower signals from the base voices. Timmy is singing into the speaker and looking at his own voice on the O'scope.
Electromagnetics wrap up session
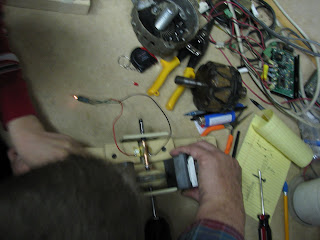
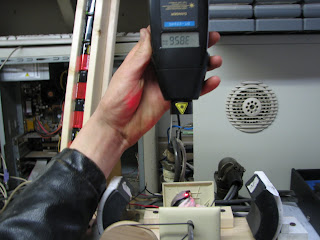
In The top photo, I am showing the boys some of the characteristics of transformers on paper. The center photo shows the DC Permanent magnet motor operating as a generator to light a small light bulb. The bottom picture shows us measuring the RPM of one of the motors with a laser beam RPM tester. How fast is that motor spinning? There must be some mistake!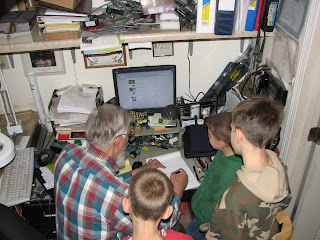 ?
?
 ?
?

Sunday, February 13, 2011
Chapter 1 Projects finished

 Luke (below right) is holding his finished permanent magnet motor. A close up of the projects completed this month is to the left. The top project board was the base for the telegraph sender, the buzzer and the half motor. The bottom is the DC permanent magnet motor. The permanent magnets are powerful arc magnets held with PVC parts, the armature "bearings" are nylon electrical outlet covers, the motor has five laminations made on our CNC milling machine, and the commutator is made of copper tape used by stained glass artists, installed over heat shrink tape. The brushes were also made by the boys from brass shim stock. The boys wound their own coils and did some of the soldering too. The wooden components were cut out of stock by the boys and all the drilling and construction was done by them. It was so neat to see the motor armature start spinning as soon as one of the magnets was moved nearby.
Thursday, January 27, 2011


Name the Parts?
 This picture will only mean something to those who know the parts of a DC motor. Next week we will finish the motors and do experiments with them.
That armature shaft is a quarter inch in diameter, with four cold rolled steel laminations 2.62" in diameter, epoxied together. The three coils are two hundred turns each of 24 gauge magnet wire, and taped after they are wound.
The commutator segments are copper with the magnet wires soldered to them. The insulator material is heat shrink tubing.
Subscribe to:
Posts (Atom)