Tuesday, April 26, 2011
Behind on updating
We at the creator club have been having lots of fun making things and learning, but the blogger is waayyy behind on updating the blog. Hopefully he will get caught up in the weeks to come.
Tom
Friday, February 18, 2011
Speak into the speaker!
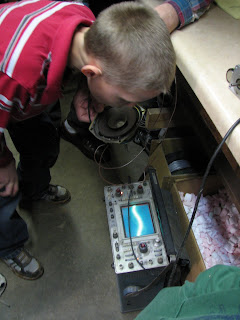
 In this session we introduced the boys to alternating current (AC). The first AC signals we looked at were generated by my "guitar string," a wire that was strung over a strong permanent magnet. As the wire is plucked, it generated a voltage which could be observed on the O'Scope. Then the boys learned that an old speaker from a radio can not only move air so we can hear the AC signals, but it can generate fast AC signals from high pitched voices and slower signals from the base voices. Timmy is singing into the speaker and looking at his own voice on the O'scope.
Electromagnetics wrap up session
 ?
?

Sunday, February 13, 2011
Chapter 1 Projects finished

 Luke (below right) is holding his finished permanent magnet motor. A close up of the projects completed this month is to the left. The top project board was the base for the telegraph sender, the buzzer and the half motor. The bottom is the DC permanent magnet motor. The permanent magnets are powerful arc magnets held with PVC parts, the armature "bearings" are nylon electrical outlet covers, the motor has five laminations made on our CNC milling machine, and the commutator is made of copper tape used by stained glass artists, installed over heat shrink tape. The brushes were also made by the boys from brass shim stock. The boys wound their own coils and did some of the soldering too. The wooden components were cut out of stock by the boys and all the drilling and construction was done by them. It was so neat to see the motor armature start spinning as soon as one of the magnets was moved nearby.
Thursday, January 27, 2011
Name the Parts?
 This picture will only mean something to those who know the parts of a DC motor. Next week we will finish the motors and do experiments with them.
Thursday, January 20, 2011
Future Electrical Engineers!?
 The boys are holding up the "guts" to their motors, called the rotor or armature. They cut their own steel shafts, stacked and epoxy'ed the armature laminations and made the commutators out of copper. By the end of this third club meeting, they had wound 400 turns out of the 600 turns each of them will wind on the motors' armatures. That's a lot of counting!
Monday, January 17, 2011
We made them ourselves!
Learning and building is fun
 The guys converted their Telegraph sender into a buzzer, then improved the buzzer by changing the type of metal used for the buzzer contacts.
Creating a half motor
The Creator Club
Prayer, asking for the spirit of God in wisdom, understanding, knowledge, workmanship, and safety.
Review:
Draw on paper a circuit of the telegraph sender.
Begin to make a buzzer:
Modify the sender using a paper clip and discuss the engineering problem that results.
Alter the design using a diode. Explain a little of how a diode works and how it solves the problem of burned contacts. Discuss contacts…silver.
Make half-motor:
Parts of a motor: armature, commutator, magnets.
History:
The first commutator-type direct current electric motor capable of turning machinery was invented by the British scientist William Sturgeon in 1832.
Sturgeon was born in Whittington, Lancashire and apprenticed to a shoemaker. He joined the army in 1802 and taught himself mathematics and physics. In 1824 he became lecturer in science at the East India Company College at Addiscombe, Surrey and in the following year he exhibited his first electromagnet.[2] He displayed its power by lifting nine pounds with a seven-ounce piece of iron wrapped with wire through which a current from a single battery was sent. In 1828 he put into practice Ampere's idea of a solenoid.
We have all of these tools, wires, nails, boards, and brass shim-stock. They are things that have already been made for us by intelligent and skilled people. How long would it take for something as simple as the telegraph sender or buzzer, or motor to ever come into existence without intelligent creative people putting it all together? Think about it. Do not ever let anyone try to sell you on the idea that complex things can exist without an intelligent creator. Those that believe such things can happen are fools according to the God of the Bible. “The fool hath said in his heart there is no God.” Psalm 14:1
Friday, January 7, 2011
First Club Session Highlights
Parents may want to review some of the things we are learning. You might learn some things too! It would be great if you asked the boys some questions about the material we covered below.
We began the session remembering The Creator:
Genesis 1:1 “In the Beginning, God created the heaven and the earth.”
Exodus 31:3 “And I have filled him with the spirit of God, in wisdom, and in understanding and in knowledge, and in all manner of workmanship, to devise cunning works…”
Let us remember to pray for wisdom.
Electricity: The movement of electrons or electrical charges through conductors.
We measure electricity in voltage and current. To understand these two measurements, compare a swimming pool 3 ft. high to a piece of garden hose 3 ft high, full of water and both of them having a valve and a water wheel at the bottom. If you measured the pressure in at the valve at the bottom of the pool with the pressure at the bottom of the hose, they would be the same. That is like the voltage. Think of volts like you think of water pressure. The higher the water in the pool, the higher the water pressure. The higher the voltage, the higher the electrical pressure. The bigger around the pool is, the longer it could power the water wheel.
Magnets can be permanent magnets (like the earth) or temporary magnets, called electromagnets.
In magnets, the electrons inside the atoms are all lined up and this makes a force that we can detect and use. In permanent magnets the electrons are stuck in that position. In electro-magnets, the electrons line up with one another while an electric current is passing through a wire wrapped around the magnetic material, but when the electrical current stops, the electrons spring back to their original position. When they spring back to their original position, they generate an electrical current in the wire!
So, when we push electrons through a wire wrapped around a steel nail, for example, it makes the nail an electromagnet, and this electromagnet pulls on other steel or magnetic material. This is how motors and other stuff works.
But, when we remove electric current from the wire, the electrons in the magnetic material go back to their original position, and we use this fact to make electric generators!
Let us always remember to give honor and credit to the Creator who made all these things and made it possible for us to use the things He made! He made the wood, the copper, the iron, the chemicals the batteries are made of, and the electrons, and current.
The Telegraph
 The first club meeting went on "overtime" for the patiently waiting moms. In this picture we are hastily hooking up one of the boy's sender to the telegraph wire and ground. We sent the electric current through the telegraph wire and the earth to a distant pole where it energized a buzzer whenever the key on the sender "button" was pressed.
The Telegraph Sender
 This is the boys' first project. Each boy cut his own boards using a jig saw and a scroll saw. They drilled the holes for the screws, wound their own coils to make their own electromagnets, and began to learn the meaning of the terms volts and current. We talked about electrons and electron flow through conductors and began to learn about electromagnetism and how it can be used. Next week we will make a very simple motor!


